Installing Starfish Monitor
Getting up and running with Starfish Monitor
The Starfish Monitor is software that you download and install on one of your own servers, just like you would install Microsoft SQL Server.
The Starfish Monitor server:
- runs as a Windows Service
- stores its data in an Embedded SQL Server database
- has an embedded HTTP server which presents the main Starfish Monitor user interface (the Starfish Monitor Web Portal)
Requirements
Your Starfish Monitor server requires:
-
Windows Server 2008 R2,
Windows Server 2012,
Windows Server 2012 R2,
(Both "Server Core" and "Server with a GUI" installations are supported for Starfish Arm) -
.NET Framework
- .NET Framework 4.5+ (download)
- Hardware minimum: 512MB RAM, 1GHz CPU, 40MB free disk space
Installation
After installation, Starfish Monitor runs as a Windows Service named Starfish.Monitor.
Permissions
By default, the Starfish.Arm Windows Service runs under the Local System context.
Ports
Starfish Monitor requires two open ports:
- 10888 for http Starfish Monitor Web Portal.
- 10222 for Starfish Arms to connect to.
Installing Arms
Starfish Monitor and Starfish Arms must be configured to communicate with each other over your network.
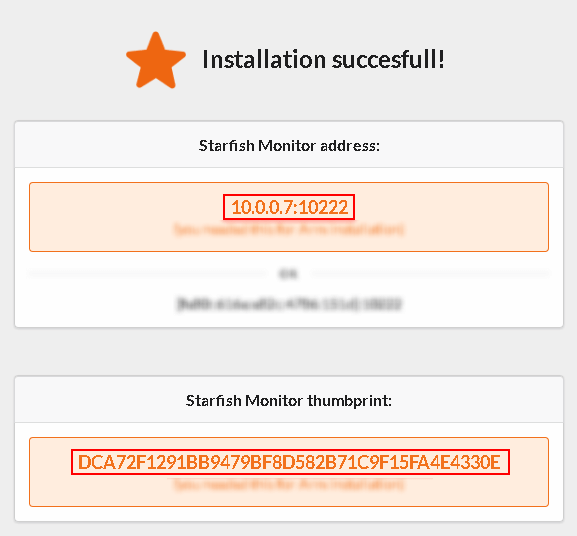
After the Starfish Monitor installation you'll be presented with the following screen:

Note the Starfish Monitor's address and certificate thumbprint. You'll be asked to provide those values during the Arms installation.
Proceed with Starfish Arms installation.
Health check
You can visit https://{your starfish monitor server address}:10222 on the monitored server to check if Starfish Monitor is available from the server you want to monitor.
If everything is OK you should see "Starfish Monitor is active, and accepting incoming messages." message.
